Catalogs
Overview
EntryScape Catalog manages and publishes catalogs with datasets, data services and distributions following recommended metadata standards, such as DCAT-AP. It makes it possible for all kinds of organizations to describe the same kind of data in the same way and to share data in a standardized manner that makes it easy for others to search, find and use the data.
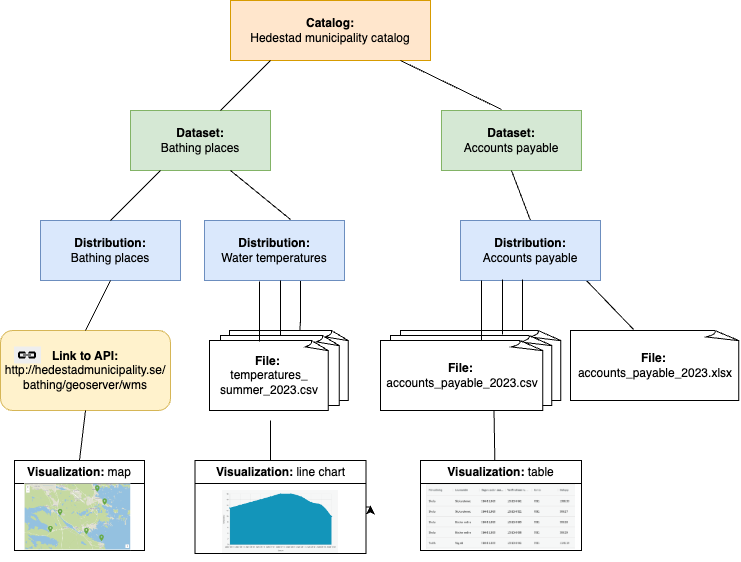 Example of a catalog with datasets, distributions, API:s, files and visualizations.
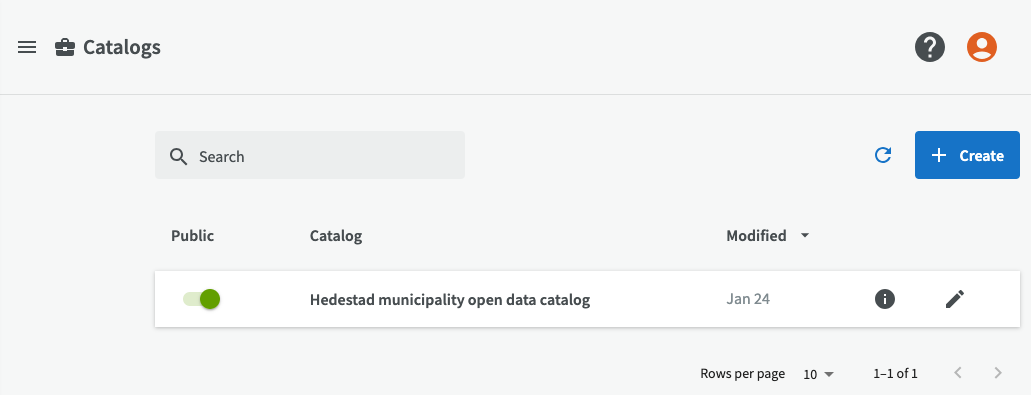
On the start page you can find the catalogs that you have already created or gotten access to. You can also see if the catalogs are public or not, meaning if they are searchable by others. If you can't see any catalog here, you will need to start by creating one or ask the group admin for access permissions.
Create a new catalog
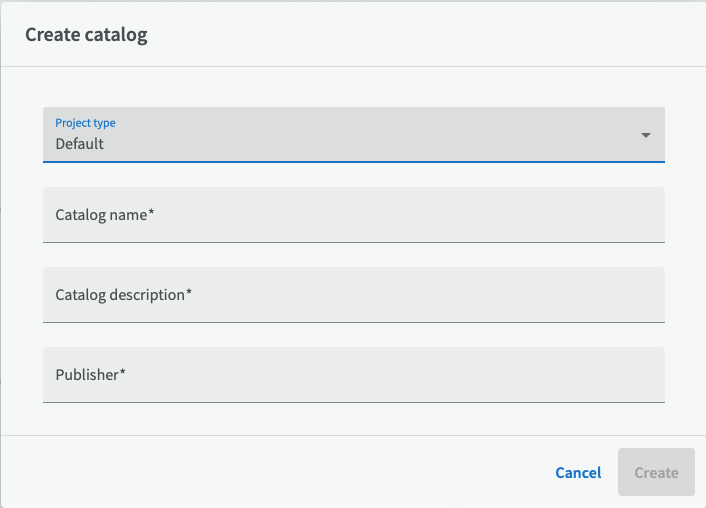
Click on the Create button to create a new catalog.
If your organization has a need to choose between several types of projects, you get to start by choosing project type for your catalog (for example a metadata standard). The standard is DCAT-AP and for geospatial data GeoDCAT-AP.
Then enter the name of the catalog, a title, such as ”Hedestad municipality open data catalog”. The title should be short and remember that all the words in title will be searchable. Enter a short description and publisher, for example "Hedestad municipality".
A catalog is always non-public when created. The user who created the catalog automatically becomes the group manager, which means that he or she administers the user access to that catalog for other users.
Many data portals expect only one data catalog per organization, but in some situations it can be better if different departments/units create and maintain their own catalogs.
Permissions and sharing settings
In EntryScape Catalog a user can generally be either a group manager or a member with read and write permissions. The group manager can give other users access to a catalog and make the catalog public. Members can edit the metadata of the catalog and create and manage datasets, distributions, suggestions etc for the catalog, but not publish catalogs. You can be a member of one or several catalogs depending on your work role and how data is organized.
If needed it's possible to get a higher level of permissions in specific cases, admin permissions, if you contact the MetaSolutions support. In such cases your organization must already have established a work routine, work group and metadata management or open data work in the management organization.
If you don't have access to a catalog, you need to contact the group manager (or admin) for that catalog in your organization. (The person responsible is likely the head of the department, manager or similar.)
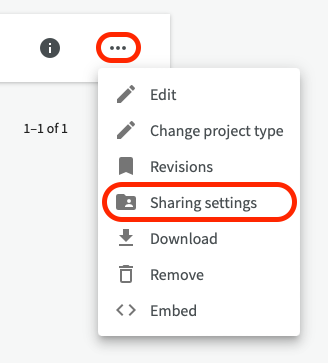
Group managers can change sharing settings for other users by going to the overview page for the catalog and click the button "Sharing settings".
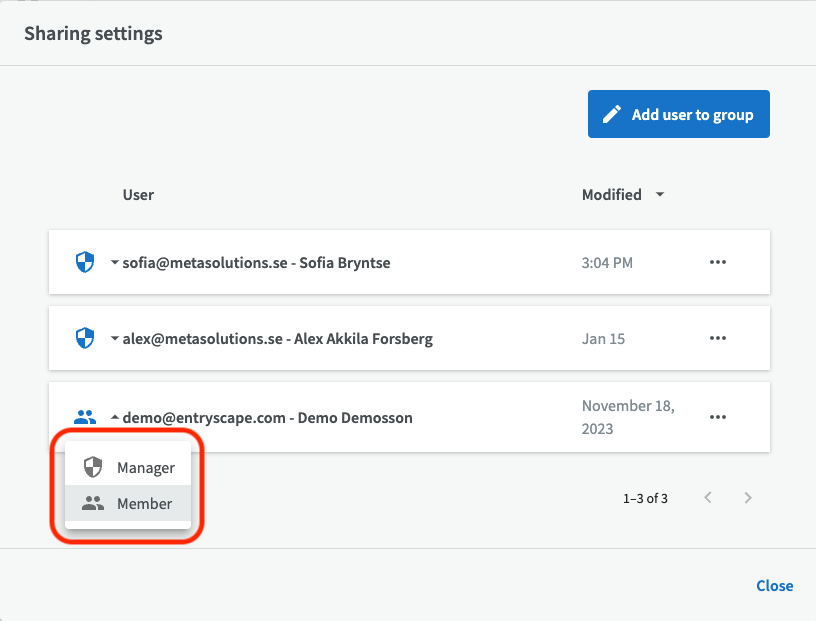
There you can add and remove users to the group who has access to a catalog. To add a user to the group, click on "Add user to group". You can also choose which level of permissions the user should have (group manager or member) by clicking on the icon before the name.
To remove a user from the group, click on the three-point menu and choose "Remove".
Enter more information about the catalog
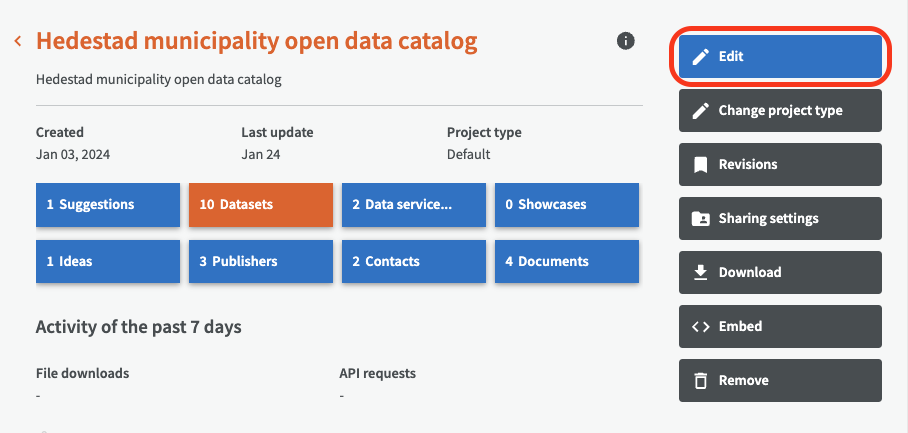
When you have created a catalog, it's recommended that you describe it with more detailed information. You can either click on the edit pen in the list of catalogs, or go to the overview page for the catalog and click the "Edit button".
The more detailed information you provide for the meta data you publish, the easier it is for others to find and reuse.
The popup window contain input fields on three different levels: mandatory information (* must be entered), recommended information (good to provide) and optional information. You can turn on and off which input fields you want to see by using the slide buttons at the top.
You already filled in the mandatory fields Title, Description and Publisher when you created your catalog. Depending on the chosen profile, you will see different input fields. Below are some examples of recommended input fields belonging to the Swedish standard metadata profile DCAT-AP-SE. You can also click on the field labels to get more information about the field.
Example of recommended fields according to DCAT-AP-SE
Release date: Creation date. It is generally more useful to set creation dates for the different parts of a catalog, such as datasets. With the date menu to the right, you can choose if you want to enter only a year, or a date or a date and time. Then you enter the year/date/time in the left fields.
Named geographical area: Name of county, municipality or town etc. You can select area by using the magnifying glass. You can easily add several geographical areas.
License: License applying for using or re-using the catalog.
Theme Taxonomy: Standard list with themes used to classify datasets in the catalog. (Contains for example "Population and society", "Environment" and "Transport" etc.)
See detailed information
If you want to see more detailed information about your catalog, click on the information icon.
![]()
Then you get a popup dialog where you can see metadata such as publisher, URI etc for your catalog as well as all entities linking to or from your catalog. Read more about detailed information.
Remove catalog
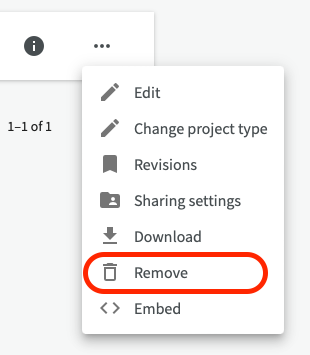
To remove a catalog, click on the three-point menu and choose "Remove".
